Access and roles
Last updated July 8, 2025
- Access
- Index
This section provides guides on authentication management on the SU platform, explains the roles, their access attributes and lifecycle.
Logging in and out
Roles and access
Other
Overview
Logging in
Last updated July 17, 2025
- Access
- Overview
This tutorial provides a step-by-step guide on how to log in to the website.
How to log in
To log in, scroll down to the bottom of any page and on the bottom right of the footer, you should see a link that says "Log in", click on it to be redirected to the login page.

Alternatively, navigate to the login page by adding "/user/login" at the end of the domain, i.e: https://su.ac.za/en/user/login. Click on the button "Log in with SU credentials".
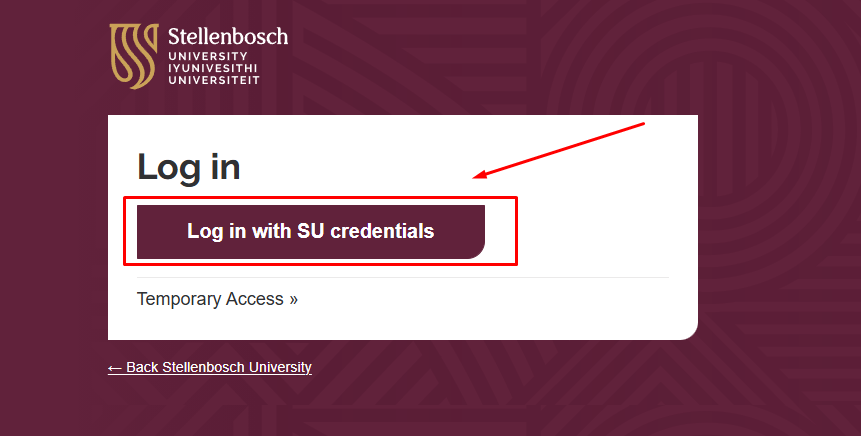
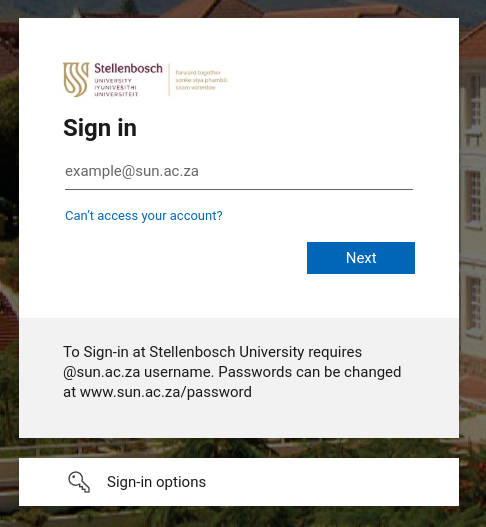
After clicking this button, you will redirected to the "Azure AD login page". Once on the "Azure AD log in page" follow the prompts to log in with your SU username and password.
Logging out
Last updated July 8, 2025
- Access
- Overview
To prevent someone from making unauthorised changes on the website, it is best practice to log out after you've finished working on the site.
How to log out
Once logged in, hover over the SU logo in the top left corner and click "Logout" to log out.
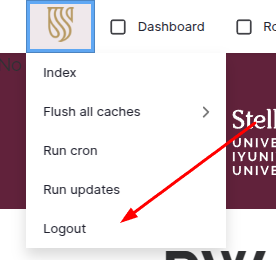
Alternatively, click the "Log out" menu item located in the footer menu.

IMPORTANT NOTE: The website will automatically log you out if you are inactive for 30 minutes and you will loose any unsaved work. The website does not automatically save your work - you must click on Save to save your work. The website considers a user active when they have saved, not when a user is typing in content or adding components, for example.
Site access
Last updated July 8, 2025
- Permissions
- Access
Who can access the website?
- All staff can access the website and request a role.
- Freelancers or service providers with a SUNid can access the website and request a role. Freelancers and service providers cannot access the website if they don't have a SUNid.
- Students cannot access the website by default. A Site owner can request access for students who will be contributing to a subsite. A link to the request form will be added soon.
Annual access confirmation
- Roles and access must be confirmed annually, to ensure that the correct users have access to the appropriate subsites.
- All active users will receive a request to confirm their access role in October, with monthly reminders until December.
- When you receive the request, check the sites you have access to and if they are correct, confirm your access.
- If you haven't confirmed your access by 31 December, all your roles and permissions will be revoked, and you will have to go through the Role request process again.
Removing access
- When a staff member leaves the employ of the University, their access to the website will be removed automatically.
- When a service provider or freelancer's SUNid expires, their access to the website will be removed automatically.
- When a staff member resigns or moves to a different department, the Site owner must notify CCMD as there are some administrative settings to take care of.
- Site owners that use students to work on their websites must notify CCMD when a student's access must be revoked.
Understanding the roles
Last updated October 2, 2025
- Permissions
- Overview
This guide outlines role attributes and permissions.
Roles
Authoriser:
Enables the user to approve and/or reject content that has been flagged for review.
Media contributor:
Media contributors can publish stories and events within their subsite. They can also escalate stories or events from their subsite to be featured on another subsite.
Contributor:
Enables the user to load content to the SU platform. These users can publish their own content within the subsites for which they are responsible. They can escalate stories (news articles) and events from their subsite to be featured on another subsite or the main stories and events pages. They can also approve (or deny) story or event escalations from other subsites.
Site owner:
Contributors can be assigned as Site owners. Site owners are the main contributors for a site and can add/manage users on their subsite.
Permissions summary
Here is a summary of the permissions associated with each role. Remember that these permissions are subsite-specific.
A user can have access to more than one subsite, with a different role on each subsite. For example, a user can be the Site owner for an academic department, and a Media contributor on the faculty subsite. This will allow them to add content to their academic department's subsite and post Stories and Events on the faculty subsite.
| Authoriser | Contributor | Media contributor | Site owner | |
| Review content | ✓ | ✓ | ✓ | ✓ |
| Create and publish webpages | ✗ | ✓ | ✗ | ✓ |
| Create and publish Stories and Events | ✗ | ✓ | ✓ | ✓ |
| Escalate Stories or Events | ✗ | ✓ | ✓ | ✓ |
| Approve escalations | ✗ | ✓ | ✗ | ✓ |
| Create webforms | ✗ | ✓ | ✓ | ✓ |
| Create new sites | ✗ | ✗ | ✗ | ✓ |
| Create/ edit menus | ✗ | ✓ | ✗ | ✓ |
| Approve Role requests | ✗ | ✗ | ✗ | ✓ |
Requesting access
Last updated August 18, 2025
- Permissions
- Access
First time users
- If you are a first time user, you must do the Role request before you can proceed to the rest of the training.
- You must select the type of Role you will need on the website and the subsite you will be working on.
- The Role you select determines the training you will be required to complete.
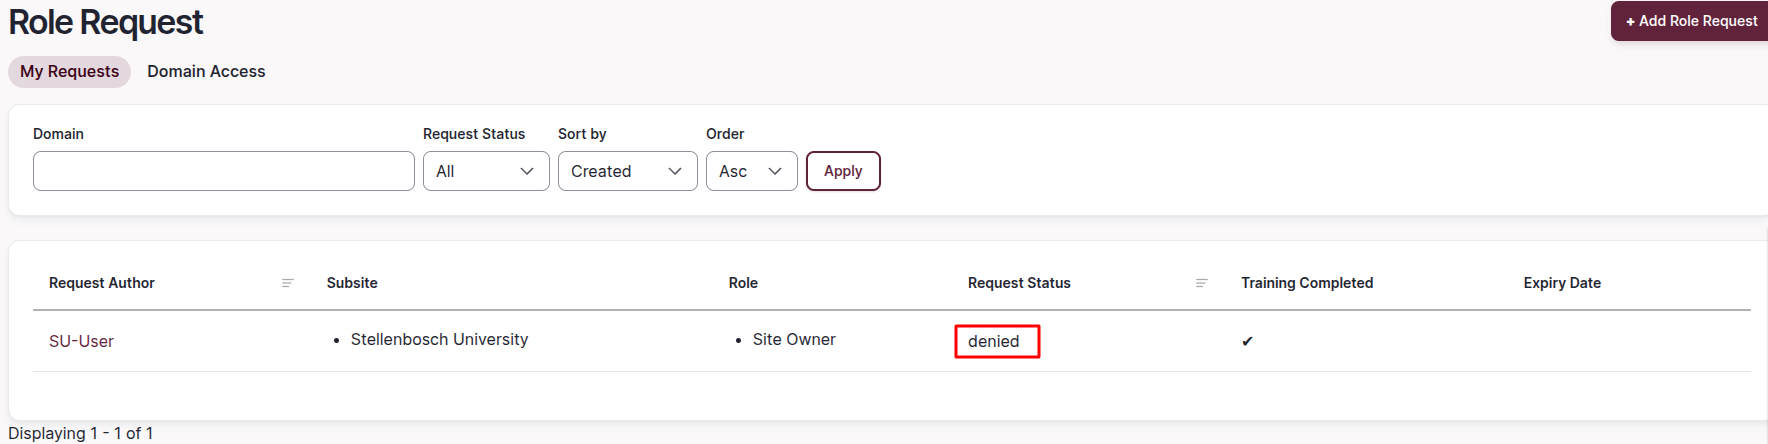
- Once submitted, the site owner/s of the subsites you requested access to will review your request and either approve or deny it. You will receive an email with the decision.
- After receiving the Role confirmation, you can refresh the Wiki page, and more training will be available to you, based on your role.
- Note that you won't be able to access your content or perform any other functions on the site until you have completed your training. Your role only becomes fully active once you've completed training.
Important note: if you are the Site owner of a faculty subsite, you must do additional Role requests for every subsite within your faculty's hierarchy (each department in other words) to ensure that you receive Role requests for your faculty.
Requesting a role
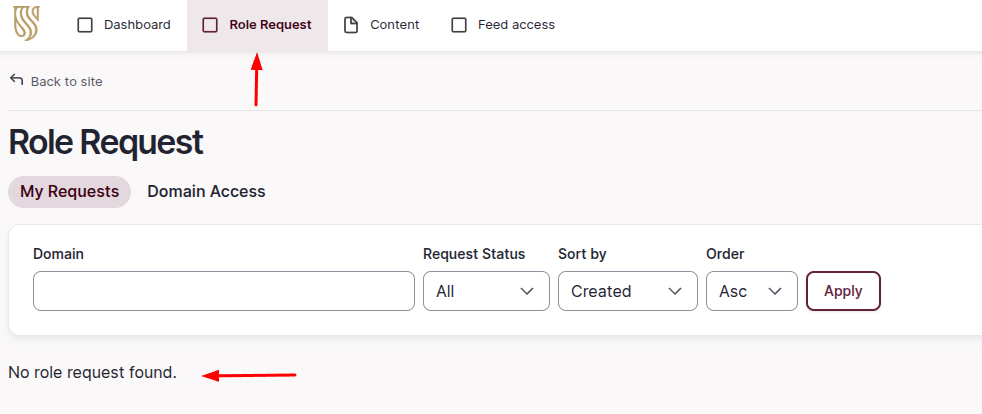
Access the Role Request section: On the menu, navigate to "Role Request". You can open the Role Request in a new tab.
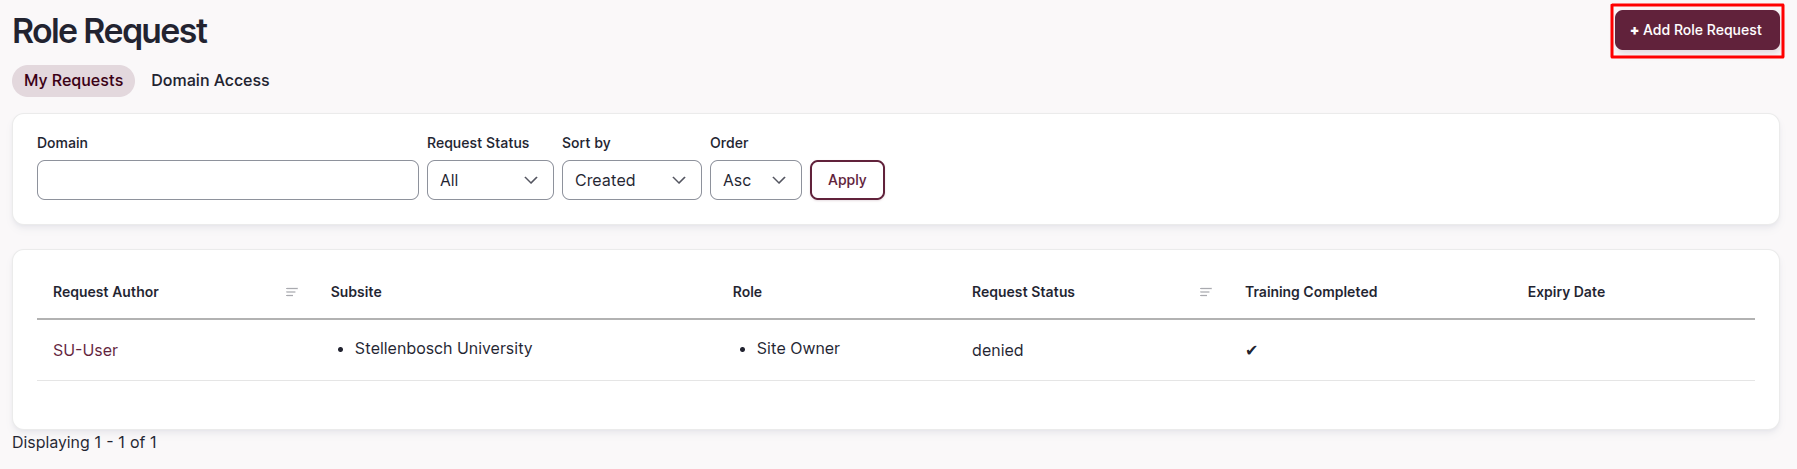
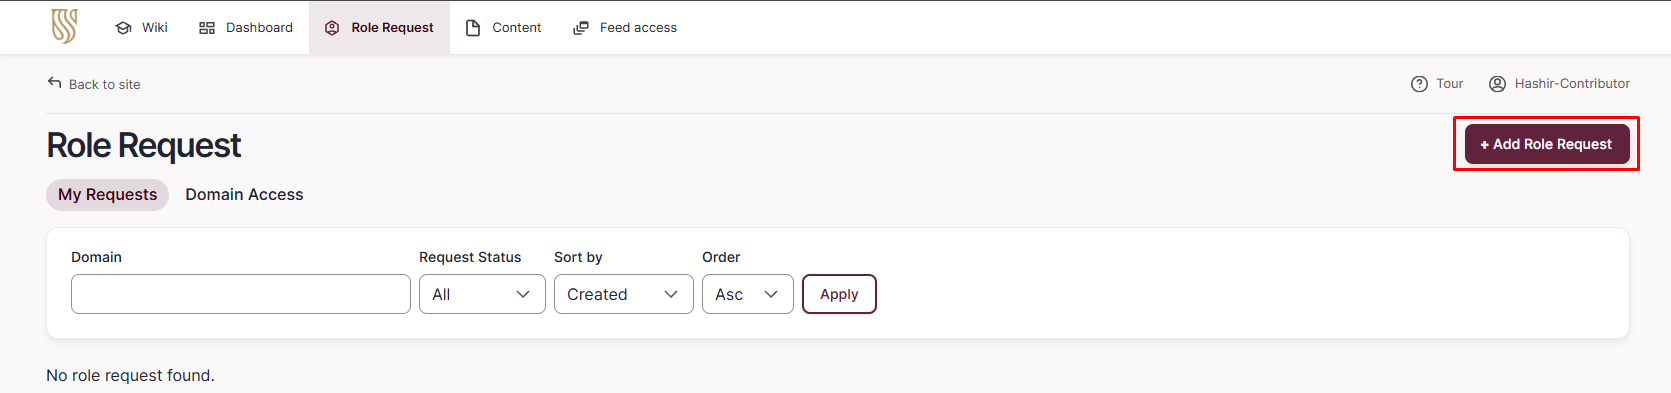
Initiate a New Request: Click on "+ Add Role Request" to start a new submission, located at the top right of the screen.

Complete the Form: You will be redirected to a form where you need to specify the "Domain", "Subsite(s)" you require and the "Role" you are requesting.
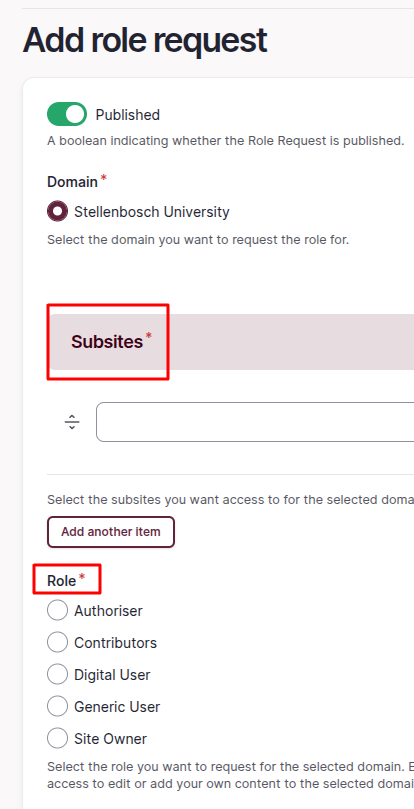
Submit Your Application: After filling in all the necessary information, click "Send Request" to submit your application.

Important note: Please don't do multiple role requests for the same site - only request the highest level of access you need. For example, if you do a request to be a Site Owner, you don't also need to request the role of Media Contributor since the Site Owner role already has the same permissions as a Media Contributor.
Reapplying for access
Last updated July 8, 2025
- Permissions
- Access
If your role request was denied, you are able to reapply for access. You will receive an email notification when the role request is denied.
Read the email you received explaining why your request was denied.
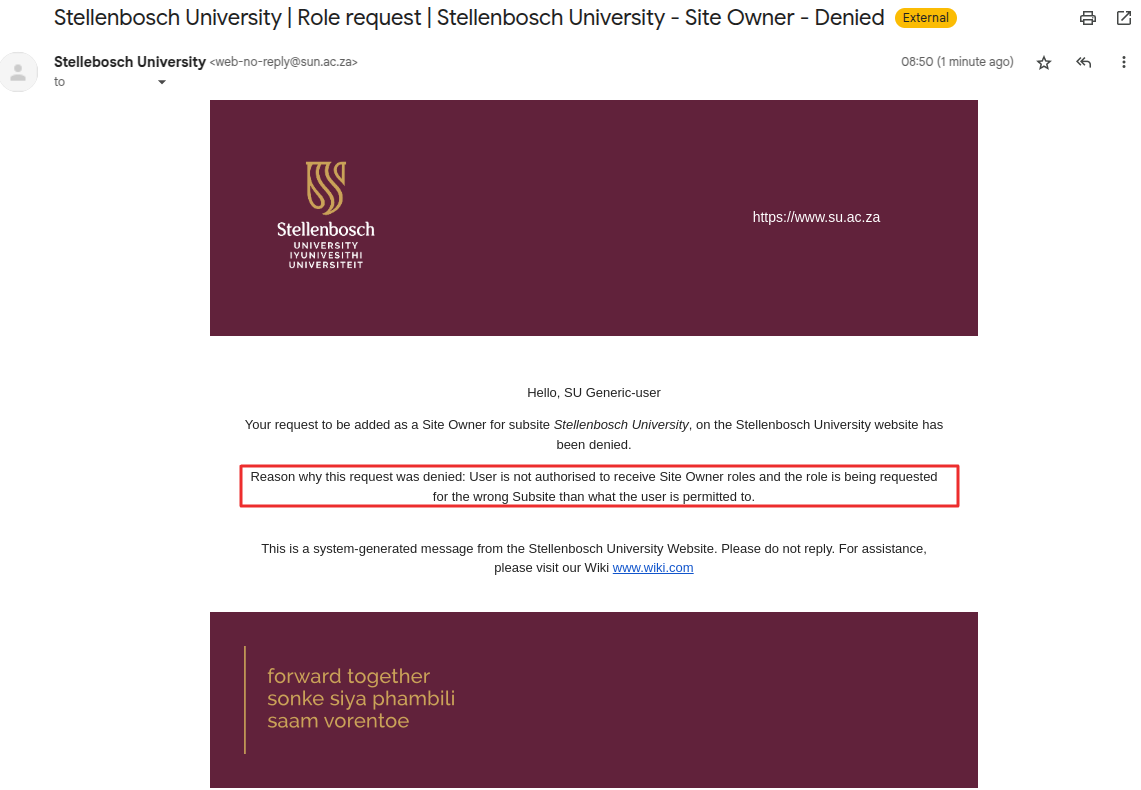
After reviewing the email, you will need to submit a new Role Request form. To learn more about how to submit a role request, please follow "Requesting access".
Using the "On Leave" function
Last updated July 8, 2025
The "On Leave" function allows you to communicate to other users that you are on leave.
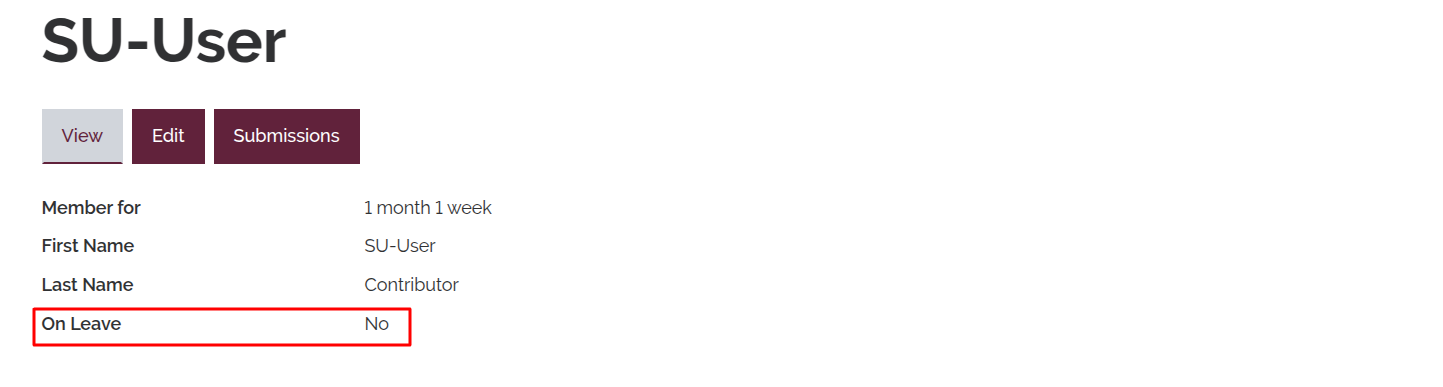
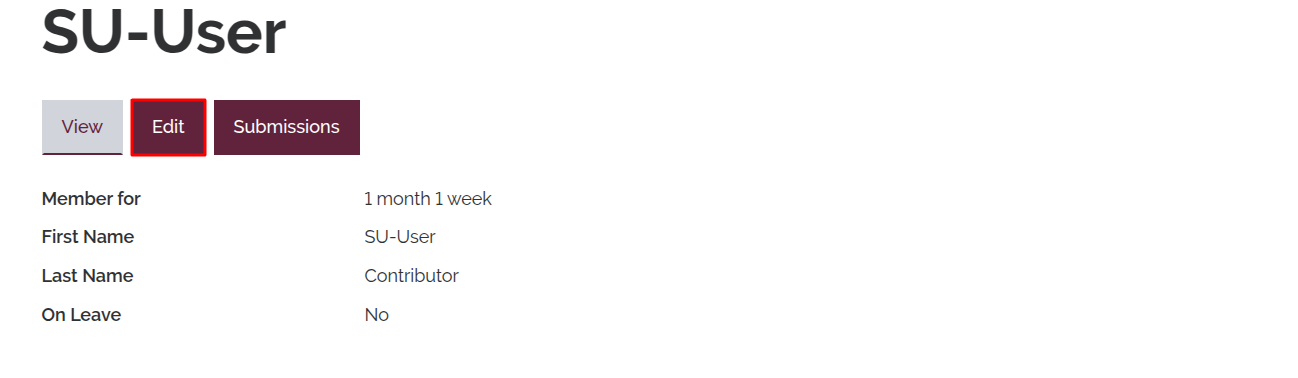
To navigate to the user profile page, click on your username on the top-right from anywhere in the back-end.

Click "Edit" on the user profile page.
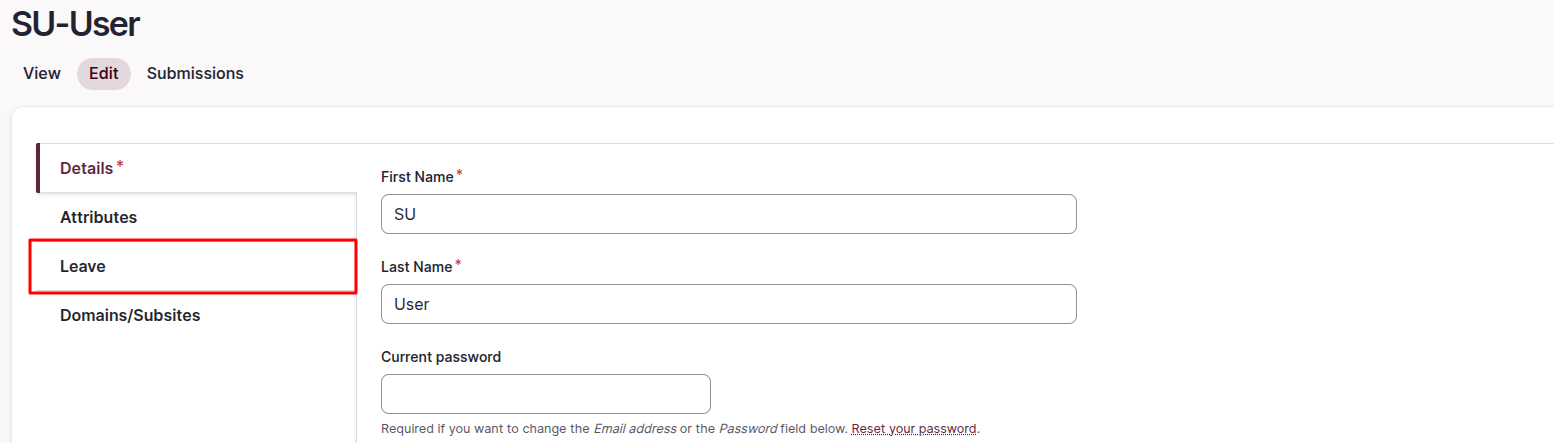
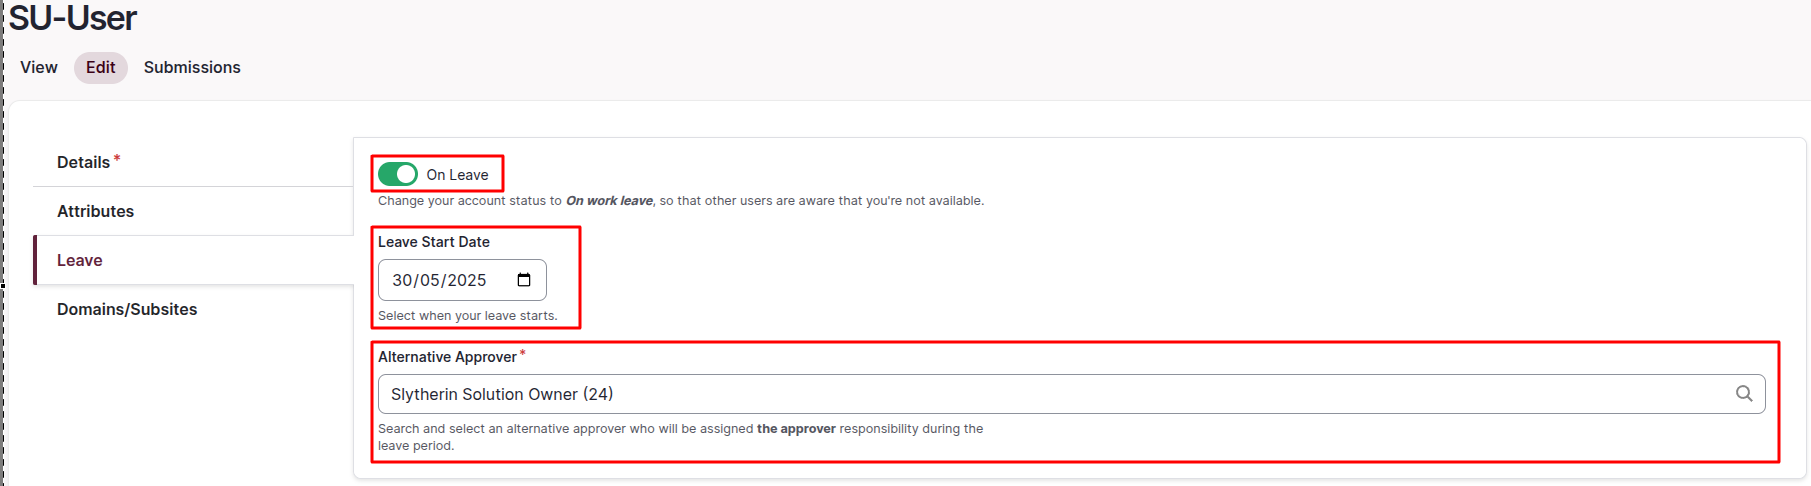
Once loaded into the user profile edit form, navigate to the "Leave" tab on the left-hand side of the form.
You will now see a toggle button for "On Leave". Enable this by clicking on it.
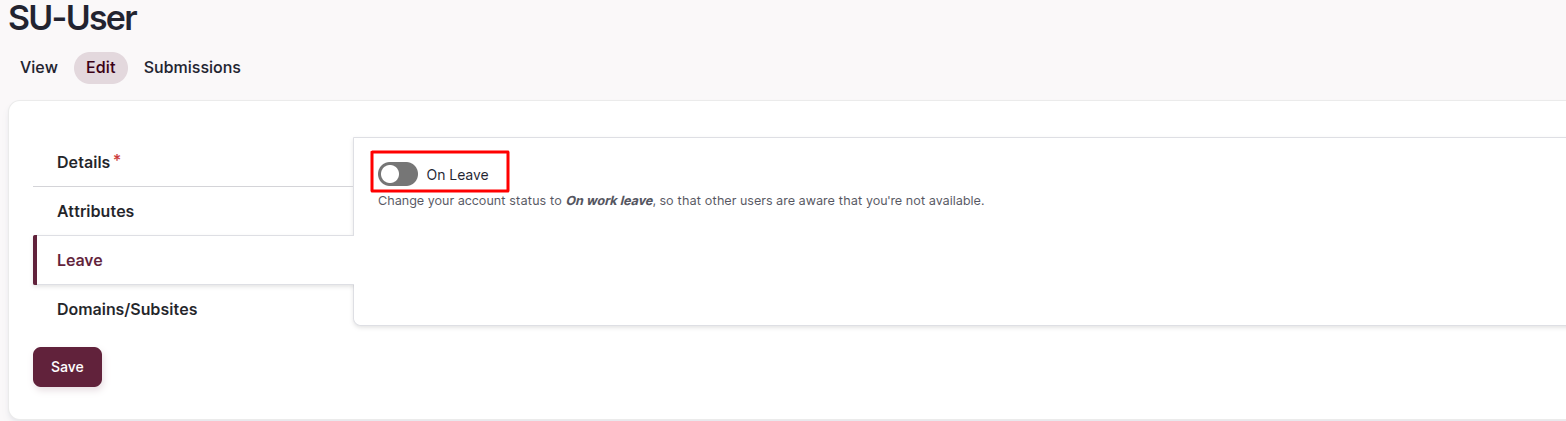
Once this has been enabled, fill out the new fields that appear. In the "Leave Start Date" field, you are able to select the date when your leave starts. In the "Alternative Approver" field, you are able to search for and assign a user as the "approver" of escalations and other requests during your leave period. Note that an approver won't inherit your rights, for example, if you are a Site owner and you select an approver that is a contributor, they won't be able to carry out tasks exclusive to Site owners, such as creating new pages.
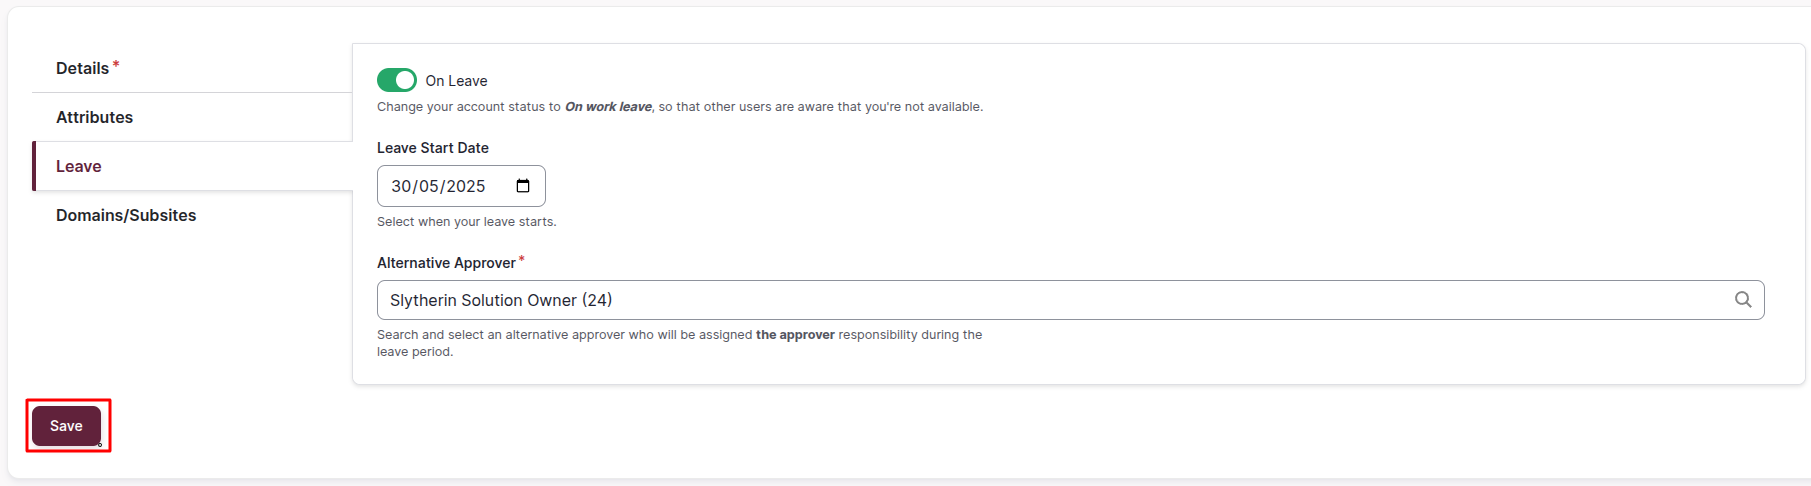
Once all the details about your leave are set, click the "Save" button on the bottom left to apply the changes.
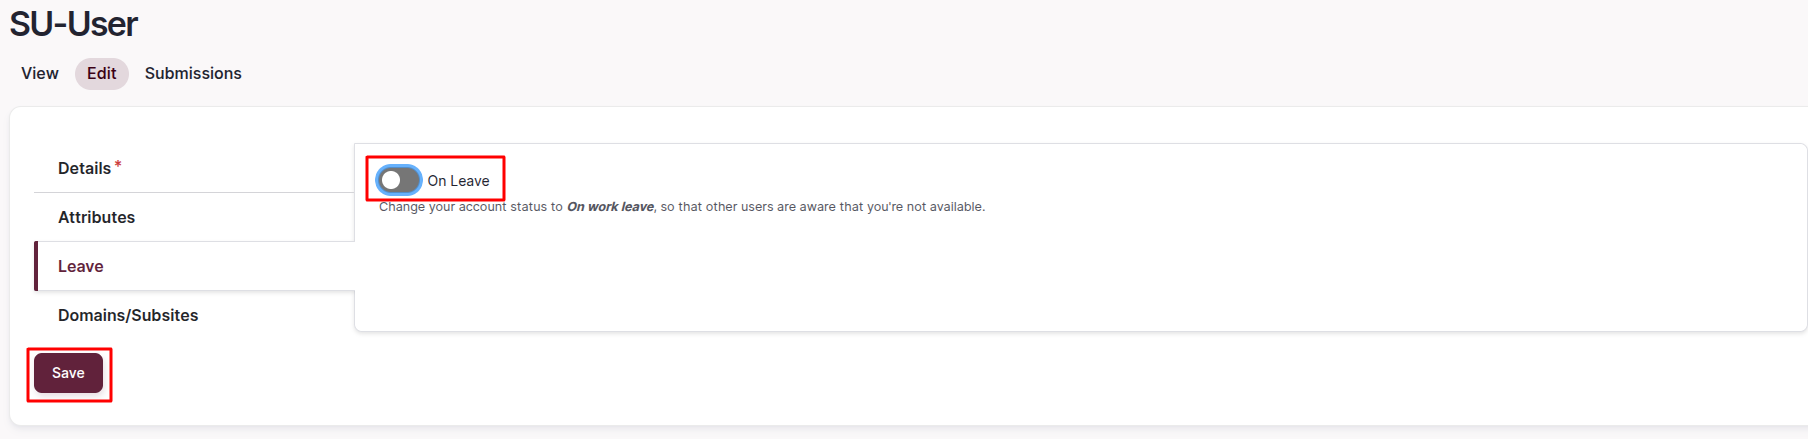
Once you have returned from leave, simply edit your user profile again, disable the "On Leave" toggle and click the "Save" button to indicate that you have returned from leave.
Logged in layout
Last updated July 8, 2025
- Overview
This article serves as a brief overview of the logged in layout. All areas shown in this article will be discussed in greater detail in their own respective Wiki entries later on.
Once you are logged in you will see the menu items that you have access to at the top of your screen. When going through the rest of the Wiki articles, you may notice that the menu shown appears different from your own, that is because your menu has been limited to only the necessary items required for your role. Any items shown in the Wiki that you are unable to see, do not pertain to your role's requirements and are to be ignored.

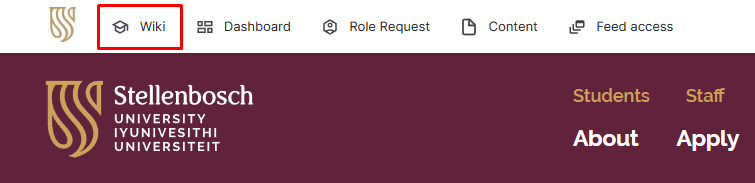
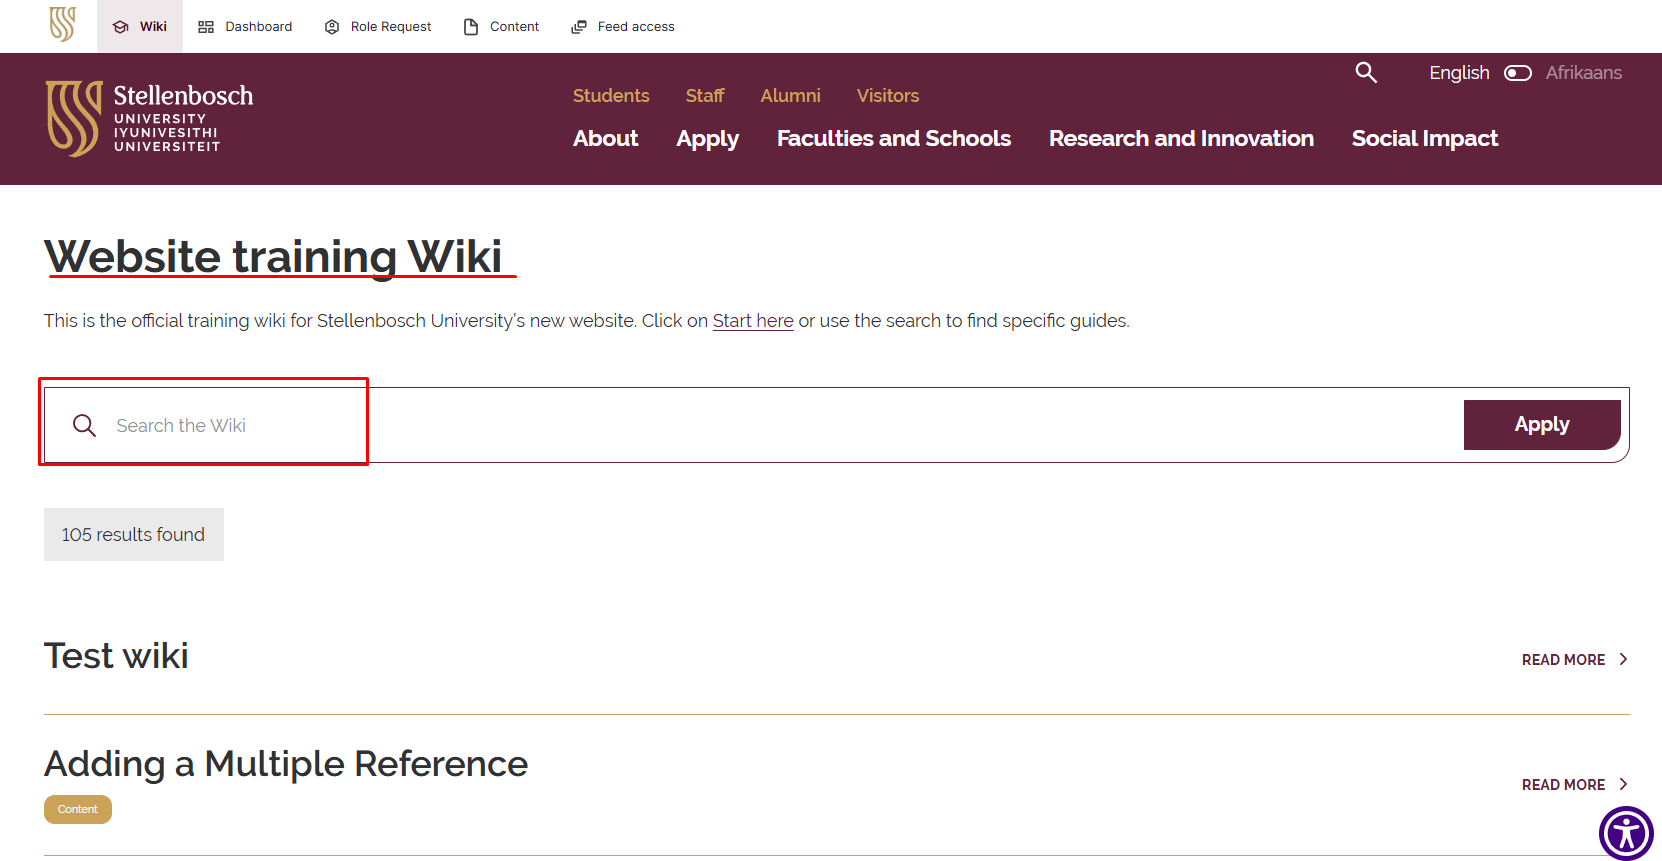
On this menu you will see the "Wiki" link. This link will take you to the Wiki landing page where you will be able to either search for specific Wiki articles or simply click on the "Start Here" link to begin reading through the Wiki content in its intended order.
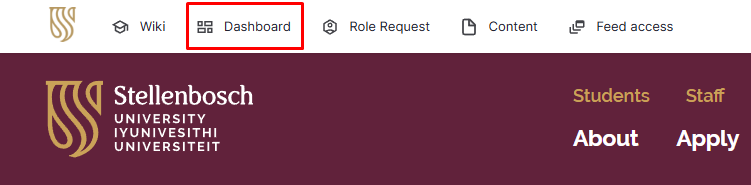
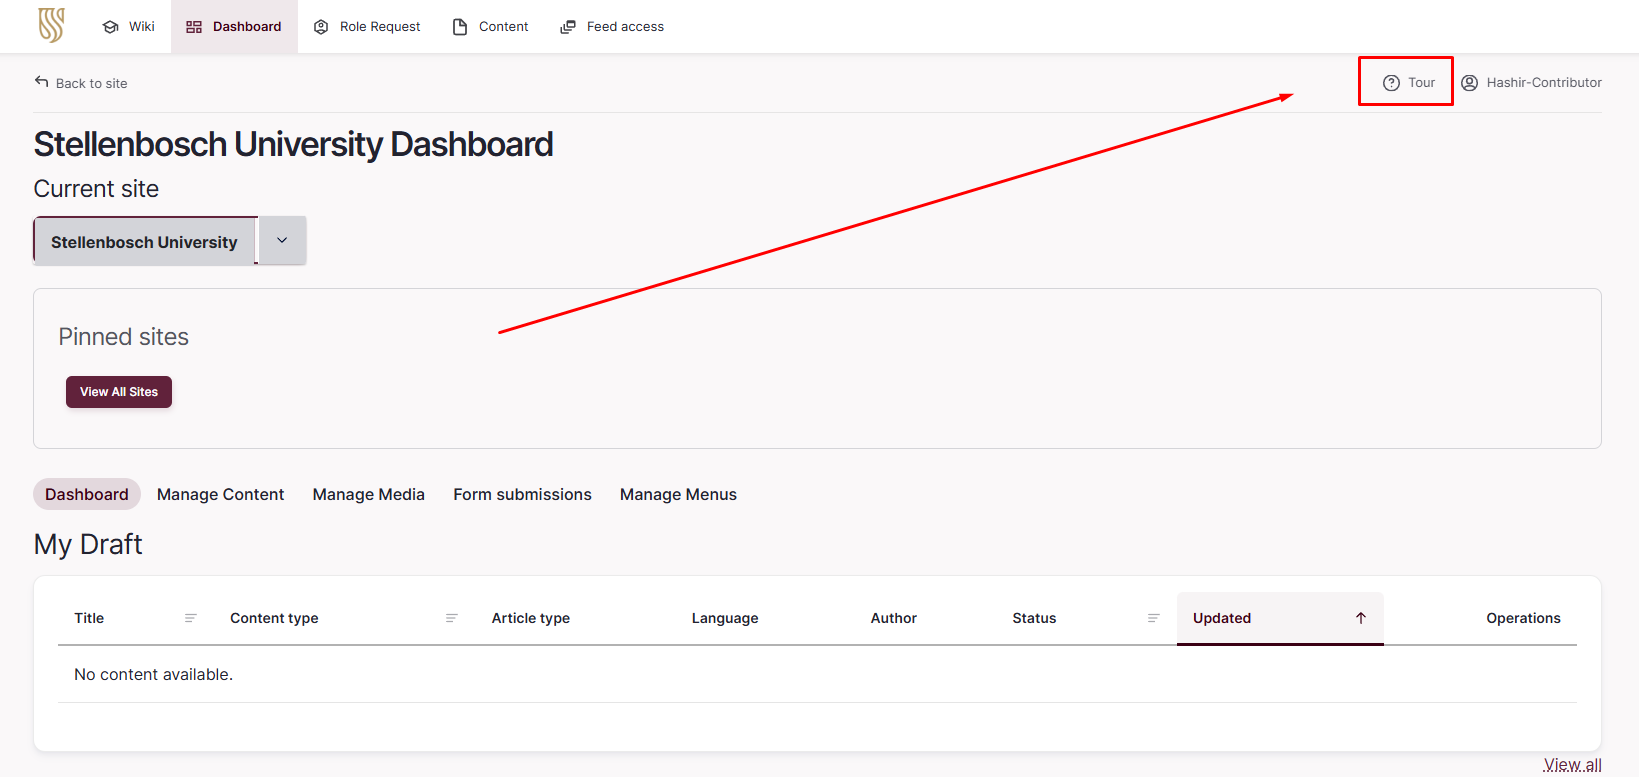
Next to the "Wiki" menu item you will find your "Dashboard" link. This will take you to your personalised dashboard and is where you will spend the majority of your time as it contains most the necessary content, links and other items required for your role.
To better understand your Dashboard, simply click on the "Tour" button located next to your username in the top right corner of your screen. This will take you on a step-by-step guide of your Dashboard. We highly recommend making use of this functionality whenever it is available to you on a page. Your dashboard will also be discussed in greater detail in its own dedicated article later on.
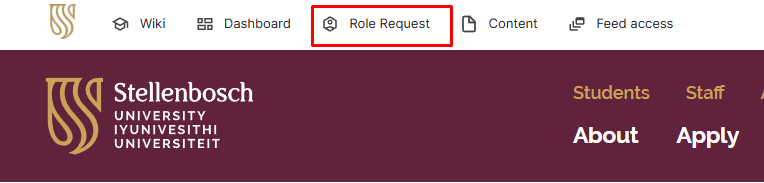
The following item on your menu is the "Role Request" button. This button leads to your "Role Request" dashboard where you will have an overview of your various role requests and their status. You can also apply for additional roles on this dashboard by clicking the "Add Role Request" button in the top right corner.
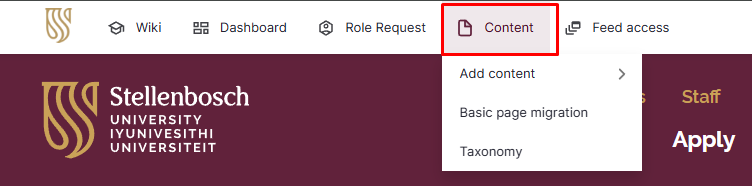
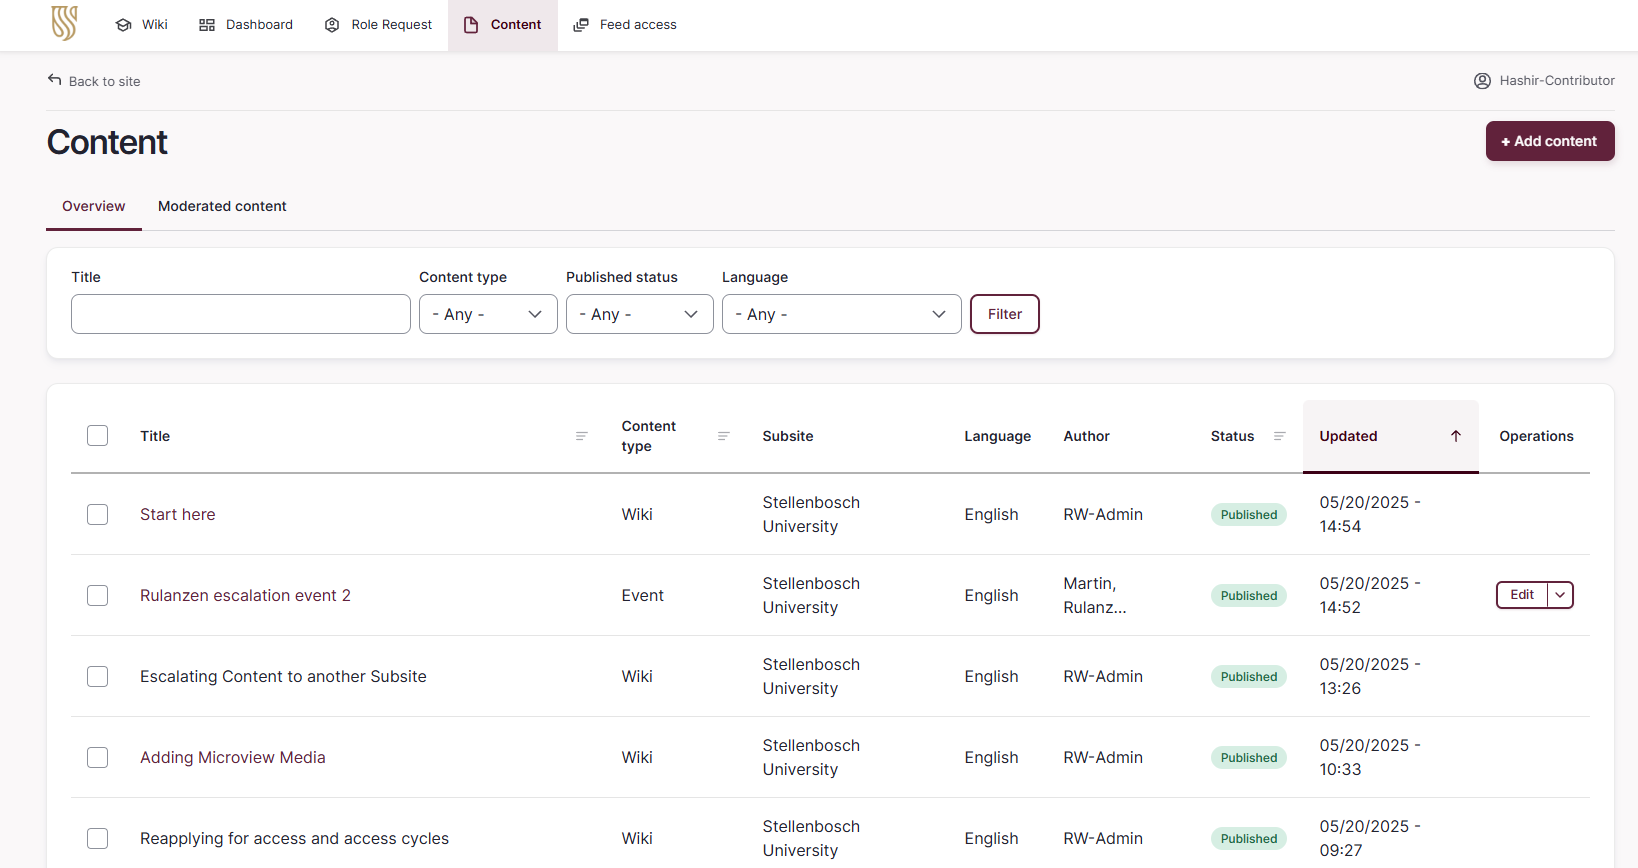
Next is the "Content" menu item. This menu item links to the "Content" dashboard and can also be hovered over for shortcuts to specific content actions and overview pages. From within the Content dashboard you are able to filter and view all content that you have access to as well as adding additional content using the "Add content" button located in the top right hand corner. Adding content is extensively covered later on in the Wiki.
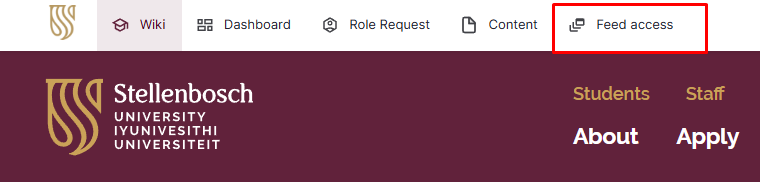
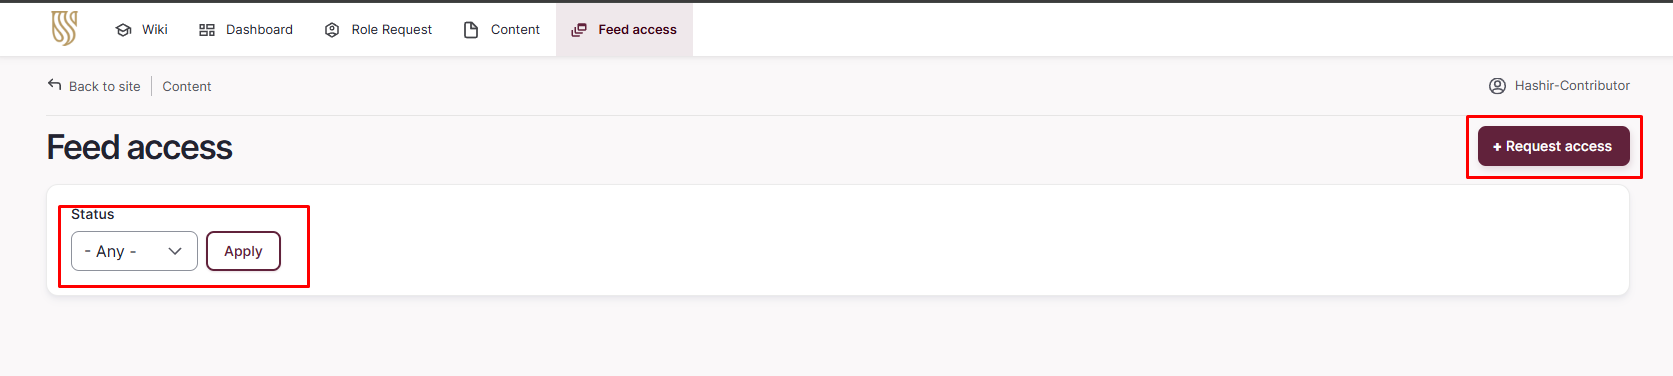
The final item located in your menu is the "Feed access" link. This will take you to your "Feed access" dashboard, where you can see the current feeds that you have access to as well as the status of any pending Feed access requests. You can also apply for additional feed access by clicking on the "Request access" button in the top right hand corner. The Wiki contains articles detailing this process later on.
The last important item you will see is your "Username" in the top right corner. When hovering over your username you will be presented with the options to view your profile, edit your profile, or logout of the site. Editing your profile will be covered at a later stage in the Wiki.

Training website
Last updated July 15, 2025
- Access
We've created a training website where you can practice what you learn during training.
About the training website
- Your role on the training website will be the same as your role on the live website (this site).
- When you are working on the training website, you don't have to worry about messing anything up or accidentally deleting anything - it won't change any of the content on the live website.
- Note that the content on the training website is not an exact replica of the content on the live website, so don't be surprised if you don't see your migrated content there.
- You can create and publish pages or any other content on the training website, it won't affect your live content.
- If you come across any warnings about modules being outdated or 'unable to send email' on the training website, you can ignore them.
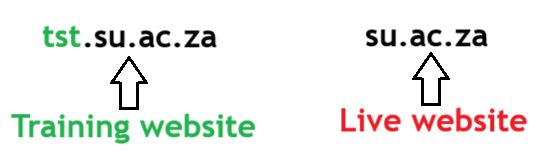
- To check which website you are on, look at the URL. The live site's URL is www.su.ac.za and the training site's URL is prefixed with "tst".
- The training website also has a banner at the top of the site indicating that it is the training website.

IMPORTANT NOTE: None of the changes you make on the training website will display or be transferred to the live website, the training website is only for training purposes.
Locate your content on Training website
The content on the training environment has not been published, so when you go to your Dashboard, there won't be any content. Follow these steps to find the unpublished content.
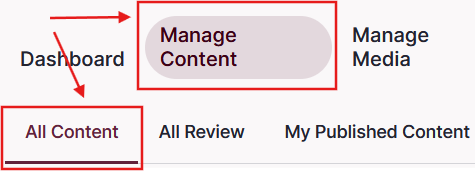
Click on "Dashboard" on the top left of the window.

Once the Dashboard has loaded, click on "Manage Content" and then "All Content"
Log in to the training environment
- Click on the link below to log in to the training environment. It will open in a new tab on your browser.
- Use you SU credentials to log in.